360 Waver for Dummies
Wiki Article
The Main Principles Of 360 Waver
Table of ContentsThe Ultimate Guide To 360 WaverNot known Incorrect Statements About 360 Waver Some Known Questions About 360 Waver.The Single Strategy To Use For 360 Waver
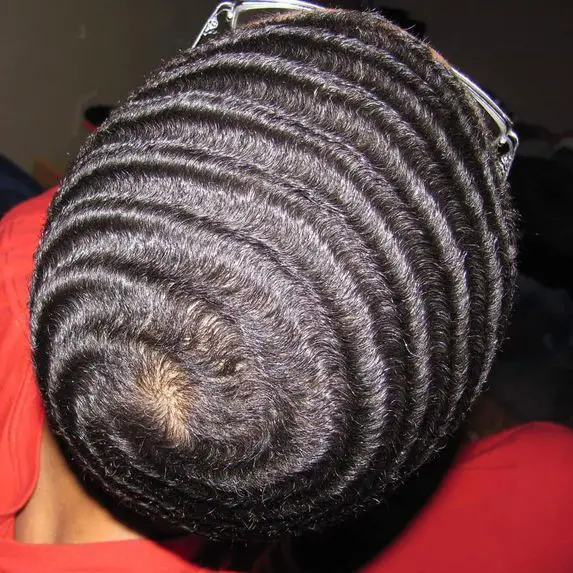
Waves that create just on top of the head are classified as 180 waves. Waves that form up and down around the hair are identified as 720 waves.
If you are interested in getting beginning your wave journey or taking your waves to a whole new level, look no further. This article will certainly malfunction every little thing you need to understand about getting wave patterns and more! Before you can start your wave trip, there are a few points you need to get from your neighborhood health as well as beauty shop.
We breakdown just how to obtain waves as a whole. We will additionally educate how to obtain waves in various forms, consisting of 180, 360 as well as 720 waves. Before starting any wave journey, you need a haircut. Your haircut will rely on where you get on your wave journey. If you are simply beginning out your wave journey, your requirement to begin fresh with a low haircut.
All About 360 Waver
There are a few haircuts you can get for waves. Below are some haircut ideas for waves: Degree 1. 5 or 2 top hair with an around hairless discolor (select degree 2 if you have been waving for some time)All over level 1. 5 or 2 haircut, Around level 1.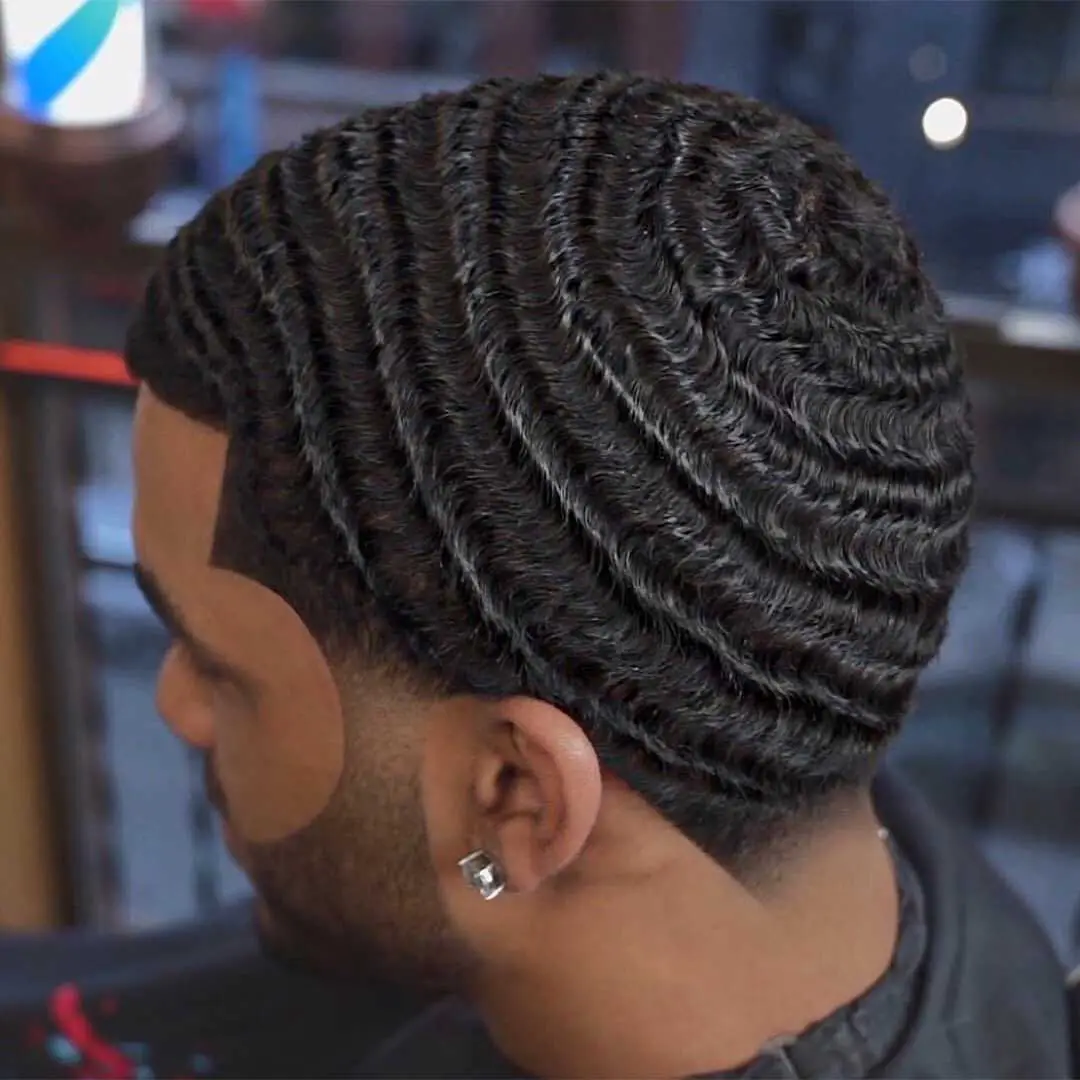

For waves, make certain to clean the hair in the shower after the shampoo is used to the hair (360 waver). Throughout shampooing, see to it to begin brushing your hair in the shower. You should make it a practice to brush your hair each time you are in the shower or when the hair is damp.
Some people choose to decide out of shampoo since over shampooing, dries out the hair as well as removes important oils from it. As opposed to shampooing the hair everyday, some shampooing everyday, choose to hair shampoo a maximum of twice each week. Constantly accompany your hair shampoo with a conditioner to recover the oils lost in the shower.
360 Waver Fundamentals Explained
With this method, you can wash the hair everyday. It likewise aids in laying the hair down which is optimal for creating the wave pattern.After this, use the palms of your hand to go over the hair in the exact same instructions as you would certainly comb it. After (and during your shampoo session), you want to right away start brushing your hair.
Take your time to informative post clean your hair only in the direction it grow - 360 waver. Begin with the crown at the rear of your hair as well as clean the hair ahead in the direction of your temple, sides as well as back. Repeat for about 515 mins. This will certainly need a great deal of dedication because it is the solitary crucial thing you require to obtain waves.
click here for info You require to comb as commonly as feasible to form the wave pattern on your head. Points to avoid when brushing waves: Never ever clean completely dry hair, Never clean versus the grain of the hair, Constantly use premium brushes After you have actually completed your brush session, you need to put on a durag.
The Best Strategy To Use For 360 Waver
You want the durag tight enough on the head to press it down but not as well tight to offer you a headache. Place the durag on your head as well as line the facility joint of the durag with the centre of your head. Make sure the leading edge of the durage websites in between your brows and also hairline.Take each tie in one hand as well as cross them over each other at the rear of the head. Make certain to keep the connections level and also not rolled. The connections ought to stock the crevis in between your ear and head, From the back, bring the gone across connections to the front of the head, making sure to maintain the connections as flat as possible.
After crossing them, bring the connections toward the rear of the head, At the back of the head, link a knot with the connections. Make certain not to make it to too tight or you will certainly get a head. Draw the flap at the back of the durag down to ensure that the durag is pushed securely on the head You must put on the durag everyday, right after your cleaning session as well as when you rest.
Yes, as long as it is not to tight on your head or gives you a migraine. If you experience any kind of frustrations from using a durag, you must right away stop wearing it as well as allow your head rest. After wearing a durag, you can clean the hair with water, brush while washing, use a conditioner this or pomade, brush once again, then reapply the durag.
Report this wiki page